Showing posts with label varnish. Show all posts

Monday, 16 July 2012

Home-made Foils DIY


First and foremost, apologies for my feet, I know they are disgusting, but I thought I'd share this post with you anyway!
You've probably all seen the nail foils that are about at the moment, hundreds of patterns available to stick straight onto your nails without any trouble! 
But I thought I'd try with actual foil. Yes, kitchen foil. 
I simply cut a small bit off a roll, and stuck it on the first two nails (the rest were too small) using clear nail polish. It might work better with nail glue, but after letting it dry and putting another coat on top they seemed to stick well!


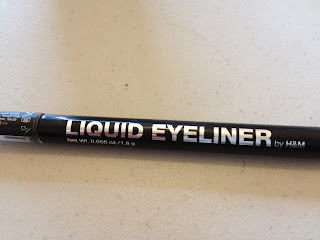
I then drew around the foil with my liquid eyeliner and coloured in the rest of my nails a bit, so they didn't feel left out. 


Here are the colour, liner and polish I used for the effect!


Monday, 9 July 2012

Splatter Effect Nails + Tutorial


I saw some splatter effect nails on instagram and had to try it. After watching a few tutorials, I thought I got the hang of it, however it was definitely a learning curve! But we got there in the end. 

What you'll need :
Nail Polish (obviously) 
I used white as a background colour, with 4x bright shades on top (below)
Straws
 cut into bits of about 3 inches long
(I tried it first using a normal sized straw and it just didn't work)
Napkin
This can get messy so do it on your bed or the floor, use a surface you don't mind getting dirty!


Put the base colour on your nails, you don't even have to let it dry before you start splatting, sometimes it works best wet.

Once you've got your base coat on, and your straws are cut, and the napkin laid down, take your first colour and dab a drop into the end of a straw. 
Try and get a good sized dollop inside and hold it upright for a few seconds so the paint goes in a bit. This is to make sure when you start blowing some will actually come out!


Once you've done this, start blowing! Don't hold the straw too close to the nail, or this happens...


You want light spats like this (below) so hold it about 2 inches away from the nail. 
A steady hand and good aim is best when doing this!


This is my first attempt on one hand. 


My second attempt went better once I got the technique right! 


As you can see it goes everywhere, but its all good fun!


Once its dried, take a cue tip, dip it in nail varnish remover, and rub off all the unwanted splats and marks and errors around the nails. 


And there you have it, easy peasy splatter effect nails!

My next attempt is going to be gradient nails, so stay tuned!


Monday, 2 July 2012

Water Marbling Attempt


I keep seeing really weird effect nails on twitter and instagram. I was intrigued so thought I'd research and give it a bash. Turns out the technique is called water marbling and believe me, its a lot harder than it looks. 
Its messy and hard to achieve but good fun!

If you want to have a go, heres how I did it, first attempt didn't really go well, but give it a try and see if you can master the art any better!


Fill a bowl with a bit of water, and add a drop of your first colour (of nail polish, obviously).


Add another on top of that. 


Once you've added a couple more, swirl the colours around with a make up brush handle, or a pencil or something. 


Dip your nails in to the colour, most people tape around their nails so they don't get paint on their fingers. 
I am not most people. 


Wipe around the edges with a cue tip or pad with nail varnish remover and voila! 


I tried again with one nail and got a better effect. 


Not very good quality pictures but this attempt worked better than the last. 
You might not be able to see but the colour goes from dark pink to light and the tip with a blue bit near the cuticle and a white streak. 


And there you have it, water marbling your nails! well kind of. 
If you have attempted it yourself, please let me know and give me some tips! 

Sunday, 29 April 2012

Super Scrimping nails


Another nail post, but I couldn't help myself, this top tip is too good not to share. Whilst at a friends a few weeks back, an episode of 'Super Scrimpers' came on. Not a programme I usually care to watch, however, filled with money saving ideas, one in particular grabbed my attention, and the idea was so simple!

The hype of nail art has hit a high with everyone giving it the DIY treatment, but have you noticed how expensive those little bottles of varnish with the tiny nail art brushes are? You could always order them in bulk from eBay but why not just use something you probably have lying around? In this case, liquid eyeliner. 


Most of them have small brushes, but I prefer my fine liner eyeliner from H&M, does the trick nicely! Simply put a coat of colour on, and depending on what style your doing (I have tried leopard print and tribal) put some dots or lines of a different colour and then draw a design over the top! 


There are loads to have a gander at on the internet for some inspiration, and once you've got the hang of it, the effects are impressive! You can try it with different styles, colours and designs, the possibilities are endless! 
To stop the eyeliner from smudging I put a coat of clear Top Coat on and this makes the design stay on for longer as well.


Some of you might already be doing this technique but those of you who didn't know, why didn't we think of it before? If you've got some eye liner lying around and feel like procrastinating, give a bit of nail art a whirl! 


(My right hand required intense concentration, so if your not so good at one hand than the other maybe get a friend to finish it off for you!)

If you have given this tip a go, take a photo and send it to me, or just let me know! I would love to feature the best ones on here :)