Showing posts with label DIY. Show all posts

Tuesday, 14 August 2012

DIY Bunting Decoration


Hey Guys!

I recently completed my little summer project of making my own bunting for my room. 

So I'm going to tell you how I did it so you lot can have a go if you like!

To start you'll need a selection of fabrics. Luckily, my mum loved the idea of bunting and bought me these beautiful patterned ones!

She also found some yellow gingham fabric in a sale bucket for about £2 for a load of it!

You'll need about half a metre of each, depending on how long you want the bunting.


Next, cut your triangle template onto card. Mine was 18cm wide by 21cm down, and there are plenty of templates online to print off.


Then you need to draw around the template onto your fabric with a pencil. Make sure your fabric is folded and it is the wrong side (the one without the pattern) so you don't get pencil marks on the finished triangle. 

To save on fabric, line the triangles up next to each other like this to cut them.


Useful tools to do this are a tape measure, a ruler and a pencil. 


Another useful tool is pinking sheers, this prevents the fabric fraying which means you don't need to do oversew each edge.


Start cutting straight on the lines of the triangles.


Once you have a triangle cut, you can start straight sewing about a centimetre around the edges, keeping it as neat as poss. You can pin the sides together to make it a bit easier, but I used thick fabric so there was no need.  


When you get to the point, reverse sew and go over it again to ensure when its turned inside out, the inside edge doesn't come out.


Turn it inside out and you should have something that looks like this.  


After a few, it starts to take shape!


Next I want to do a few letters on the triangles. I'm going to do my name. 

I found these templates online, make sure when you print them out that the size is OK for your triangle. 


Draw around the template onto the wrong side of a different fabric.


Cut it out. 


To save space you can line straight letters up neatly.


Right, for some reason I didn't photograph this bit so I'll try my best to describe!

Before sewing your triangle pieces together, place a letter on the right side of one of your pieces. 

As neatly as you can, after pinning or tacking your letter, do a zig zag stitch around the edge of the letter. 

Once you've done this, put the right sides together and sew your triangle pieces, turn it inside out and voila!

Next, you'll need a hefty amount of bias binding. 


Fold it.


And place the top edges of your triangles in the fold and pin. 


Then sew along the edge of the binding as neatly as you can in a straight stitch. Be sure to leave about 4/5 inches between each triangle. 

And there you have it!

Your very own bunting!


Hope you like this DIY and give it a go yourself!

Monday, 16 July 2012

Home-made Foils DIY


First and foremost, apologies for my feet, I know they are disgusting, but I thought I'd share this post with you anyway!
You've probably all seen the nail foils that are about at the moment, hundreds of patterns available to stick straight onto your nails without any trouble! 
But I thought I'd try with actual foil. Yes, kitchen foil. 
I simply cut a small bit off a roll, and stuck it on the first two nails (the rest were too small) using clear nail polish. It might work better with nail glue, but after letting it dry and putting another coat on top they seemed to stick well!


I then drew around the foil with my liquid eyeliner and coloured in the rest of my nails a bit, so they didn't feel left out. 


Here are the colour, liner and polish I used for the effect!


Saturday, 14 July 2012

Guest Post for Bel et Bien


Hey guys I recently did a guest post for Bel et Bien.
A really cool blog by two young irish girls.
 I have followed them for a while and am always intrigued by their creative DIYs and style tips.
You can look at my Festival Tops DIY post HERE. 

Hope you like what you see! 

Tuesday, 10 July 2012

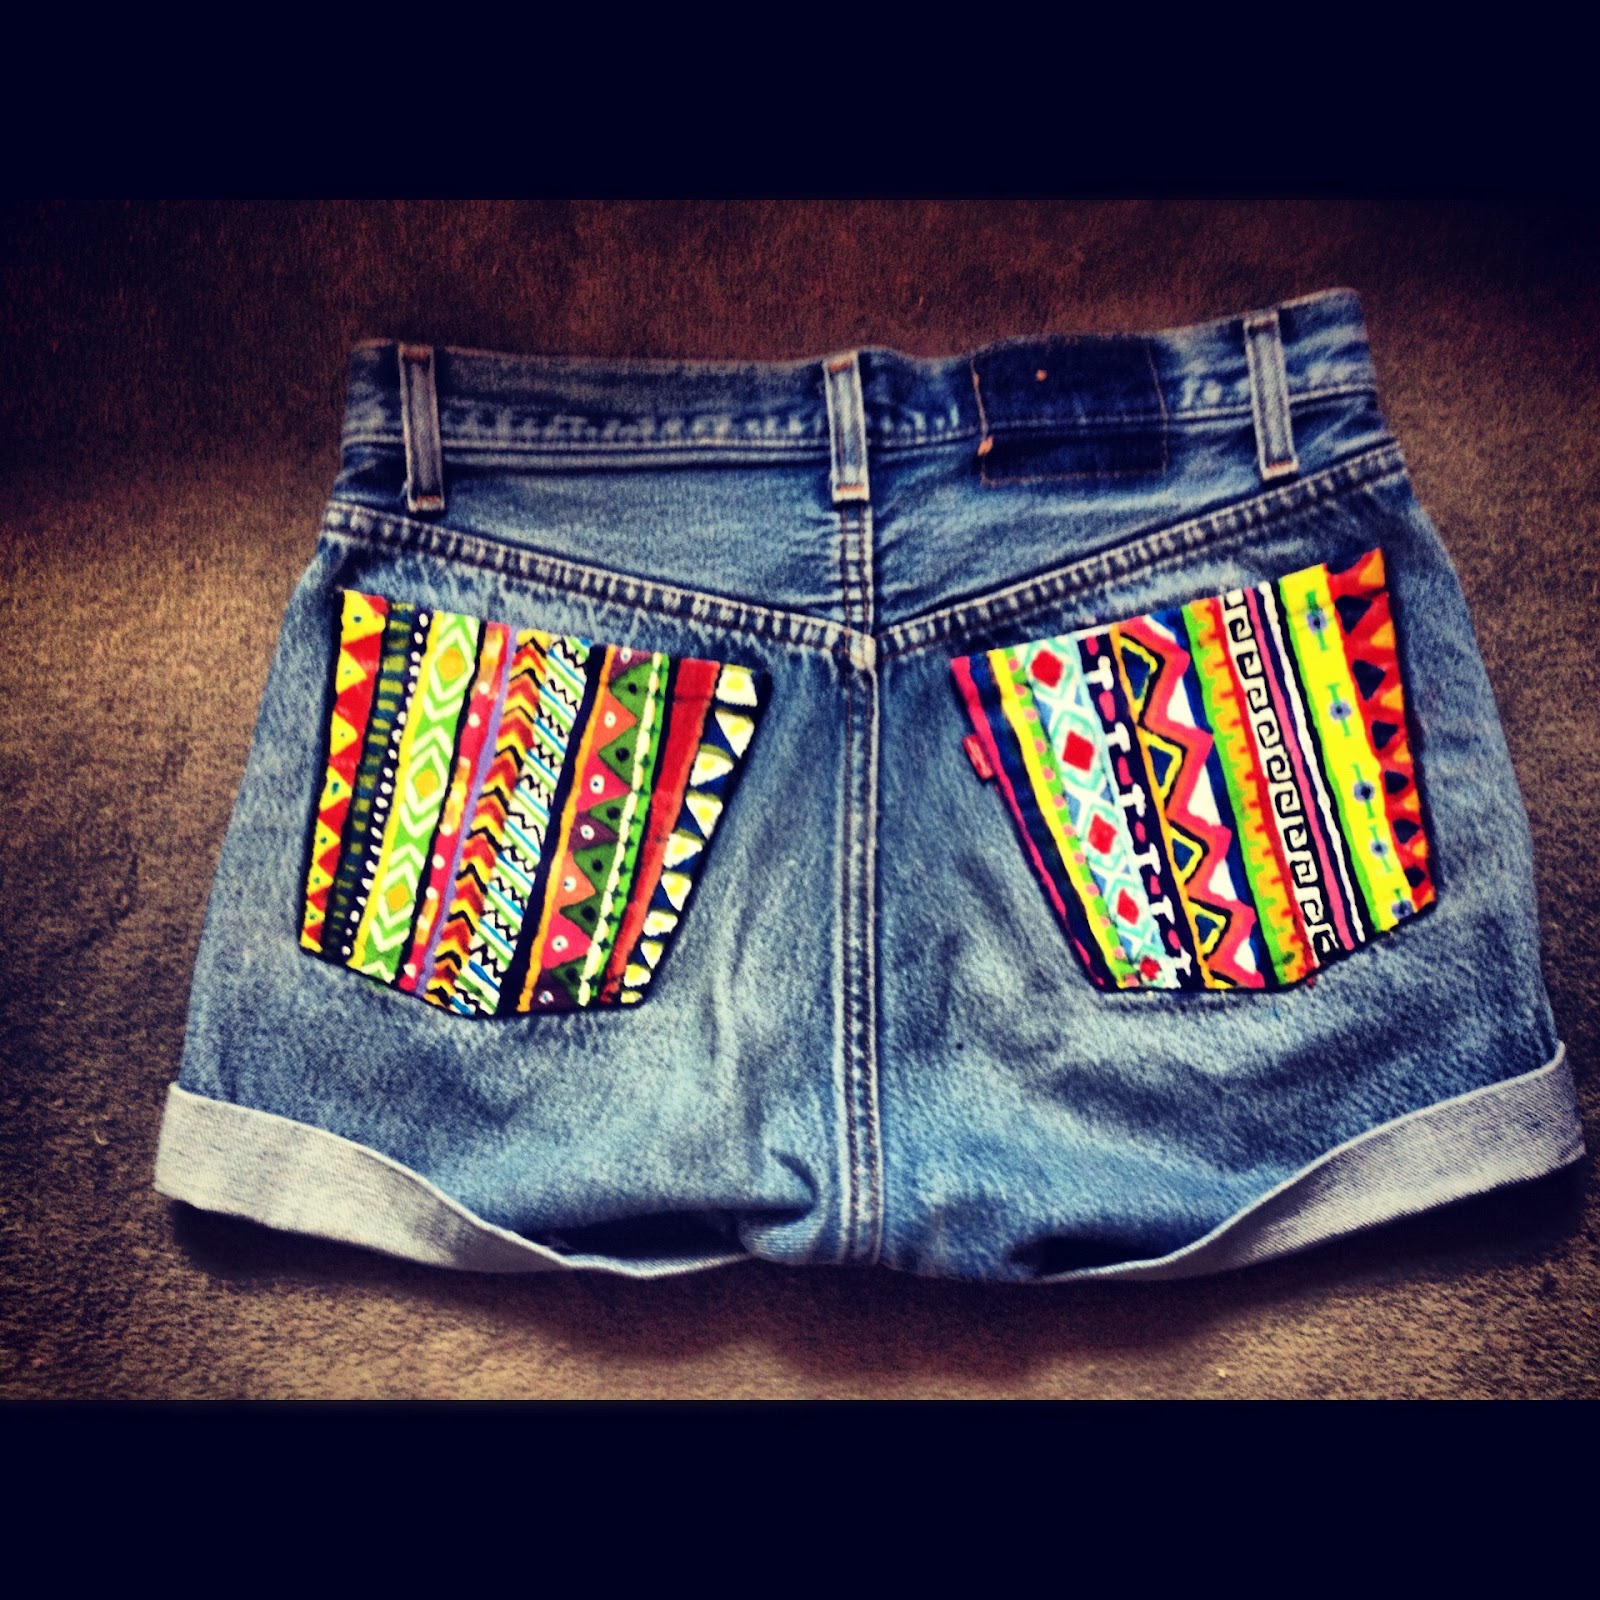
DIY Tribal Shorts


My beloved levi shorts were on their last legs, so I decided to give them a make over. 
This trend is is popular this season with H&M anD Topshop having both done denim shorts with tribal accents.

I had loads of paint left over from my textiles days,  so after researching a few aztec patterns, I got to work painting. 
I used acrylic and fabric paint, so I daren't put them in the wash until I find something to seal it onto the fabric! 

I started off with a few stripes. 


I then started adding a few patterns. 


I did it on the front and back pockets. 
And here is the finished result! 


I teamed them with a small black waist belt and my urban outfitters aztec bag which I got in the sale last year. 


I think I'll save these for the only festival I'm going to this summer. 

Tuesday, 26 June 2012

DIY IPhone Cover


I bought a pretty pink floral iPhone cover from ebay the other week, but when it arrived, it wasn't what I hoped and I put it to one side. Due to extreme boredom and need of a creative outlet, I attacked it with glitter and beads. 
Simply rustle around in your craft box, find some beads, buttons, anything that matches the cover or go out and buy some, they are fairly cheap and get gluing! 


You might have seen the really OTT covers on Etsy (examples below) but lets just say I was going for something like that, and this is the end result! Now I'm a firm believer in taking something worth keeping and making it beautiful, so I'm hoping (even though this isn't to my taste) someone will like it!

Images below, all taken from here.


 I actually really like these ones. I was going to buy one but I have an old purple iPhone cover that I might just make myself!