Hey Guys!
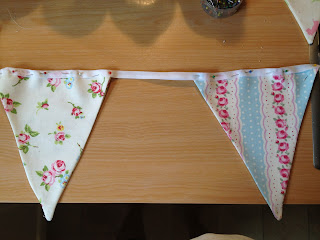
I recently completed my little summer project of making my own bunting for my room.
So I'm going to tell you how I did it so you lot can have a go if you like!
To start you'll need a selection of fabrics. Luckily, my mum loved the idea of bunting and bought me these beautiful patterned ones!
She also found some yellow gingham fabric in a sale bucket for about £2 for a load of it!
You'll need about half a metre of each, depending on how long you want the bunting.
Next, cut your triangle template onto card. Mine was 18cm wide by 21cm down, and there are plenty of templates online to print off.
Then you need to draw around the template onto your fabric with a pencil. Make sure your fabric is folded and it is the wrong side (the one without the pattern) so you don't get pencil marks on the finished triangle.
To save on fabric, line the triangles up next to each other like this to cut them.
Useful tools to do this are a tape measure, a ruler and a pencil.
Another useful tool is pinking sheers, this prevents the fabric fraying which means you don't need to do oversew each edge.
Start cutting straight on the lines of the triangles.
Once you have a triangle cut, you can start straight sewing about a centimetre around the edges, keeping it as neat as poss. You can pin the sides together to make it a bit easier, but I used thick fabric so there was no need.
When you get to the point, reverse sew and go over it again to ensure when its turned inside out, the inside edge doesn't come out.
Turn it inside out and you should have something that looks like this.
After a few, it starts to take shape!
Next I want to do a few letters on the triangles. I'm going to do my name.
I found these templates online, make sure when you print them out that the size is OK for your triangle.
Draw around the template onto the wrong side of a different fabric.
Cut it out.
To save space you can line straight letters up neatly.
Right, for some reason I didn't photograph this bit so I'll try my best to describe!
Before sewing your triangle pieces together, place a letter on the right side of one of your pieces.
As neatly as you can, after pinning or tacking your letter, do a zig zag stitch around the edge of the letter.
Once you've done this, put the right sides together and sew your triangle pieces, turn it inside out and voila!
Next, you'll need a hefty amount of bias binding.
Fold it.
And place the top edges of your triangles in the fold and pin.
Then sew along the edge of the binding as neatly as you can in a straight stitch. Be sure to leave about 4/5 inches between each triangle.
And there you have it!
Your very own bunting!
Hope you like this DIY and give it a go yourself!


No comments:
Post a Comment
Any comment is greatly appreciated. If you leave your blog link I'll be sure to stop by, thanks guys!